WELCOME TO THE BRICK TRICK ONLINE STUDIO

Here you can view our designs, projects and building instructions.

Thursday, October 30, 2014

Brick Flower Arrangement

Above: A "Brick Flower Arrangement".

BRICK FLOWER ARRANGEMENT

Brick Trick artist Trick Richey set out to create a "more organic" form, as he put it, "different from the architectural buildings I often create".

The result is the brick floral sculpture in this posting, which is made up of seven different brick flowers all arranged in a clear cylindrical brick vase.

Above: Close-up of the largest flower in the bunch, which is constructed from a dish, 1x1 plates with clips and white 1x6 bow bricks.

Above: Close-up shows two of the smaller flowers made from plates and transparent cones.

Above: A variety of parts were used to create the blooms, and green 1x1 bricks make up the stems.

Above: A yellow-centered "daisy" is made from a bright light orange dish, 1x1 plates with clips and white 1x3 bow bricks.

Sunday, October 5, 2014

"SKINNY BRICK TOWN" Series of Buildings

Above: Brick Trick artist Philip Buchan created a town of buildings, most constructed with only an eight peg width.  Some of the buildings are only 6 pegs wide.  Can you spot the one 7 peg and one 9 peg wide buildings?

"SKINNY BRICK TOWN" Series of Buildings

Brick Trick artist Philip Buchan created an entire town of buildings, all constructed on very narrow "lots".

The scale of this series is suitable for minifigures, (and you'll see plenty of them hanging out on various balconies and many other places).

REMINDER: Enlarge the images by clicking on them.

Below: The back view of the street, with plenty of action happening in the tiny yard spaces and along the sidewalk.

Above: A closer view of some of the buildings.  No two structures are exactly the same color scheme and all have unique architectural details.  Notice the small alley created between the blue and the gray buildings, which are only six pegs wide each.

Above: The other end of the SKINNY BRICK TOWN block.

Above: The "teal" and the "caramel" buildings are only six pegs wide each with a narrow alley running between them.

Below: The other "alley" as previously mentioned. 

Above: Neutral color buildings such dark tan sit next to bolder choices like orange, purple and blue.


Monday, September 8, 2014

Earrings Made From Minifigures

Above: Minifigure "Chef Girls" have been made into dangle earrings.

Earrings Made From Minifigures

We took several of our favorite minifigures and turned them into earrings.  We simply glued the minifigure wig or hat in place on the minifigure head, and then we drilled a small hole centered at the top.  Threaded metal eye-hooks were screwed into the holes and then proper ear wires were attached to complete the earrings.

Earrings make a great gift.  Find many designs in the Brick Trick Dude Ebay store, CLICK HERE.

Above: A cowgirl and cowboy set of earrings.

Above: The "Movie Star" earrings.

Tuesday, May 20, 2014

PINK & AQUA AIRPLANE CUSTOM KIT - BUILDING INSTRUCTIONS

Above: The PINK & AQUA Airplane kit shown assembled with female minifigure Amelia.

PINK & AQUA AIRPLANE CUSTOM KIT - BUILDING INSTRUCTIONS

This posting contains images and directions identical to the printed directions that are included when you purchase this custom building kit from BRICK TRICK DUDE on Ebay.


Above: Parts included in the custom building kit.

PARTS LIST
1 white 1x2 tile w/tailfin
1 black/white steering wheel
1 clear transparent 2x2
   45-degree slope
1 black propeller
1 white 1x2 brick w/stud
2 aqua 2x8 plates
2 medium lavender 1x4 plates
2 bright pink 2x2 bricks
2 white 1x2 grills
9 bright pink 1x2 smooth tiles
2 white rims
2 black rubber tires
1 light gray 2x2 axle plate

Minifigure Pilot “Amelia” is assembled and includes:
1 brown ponytail wig
1 female head with pink lipstick
1 rainbow stars pattern torso
1 orange hips/legs

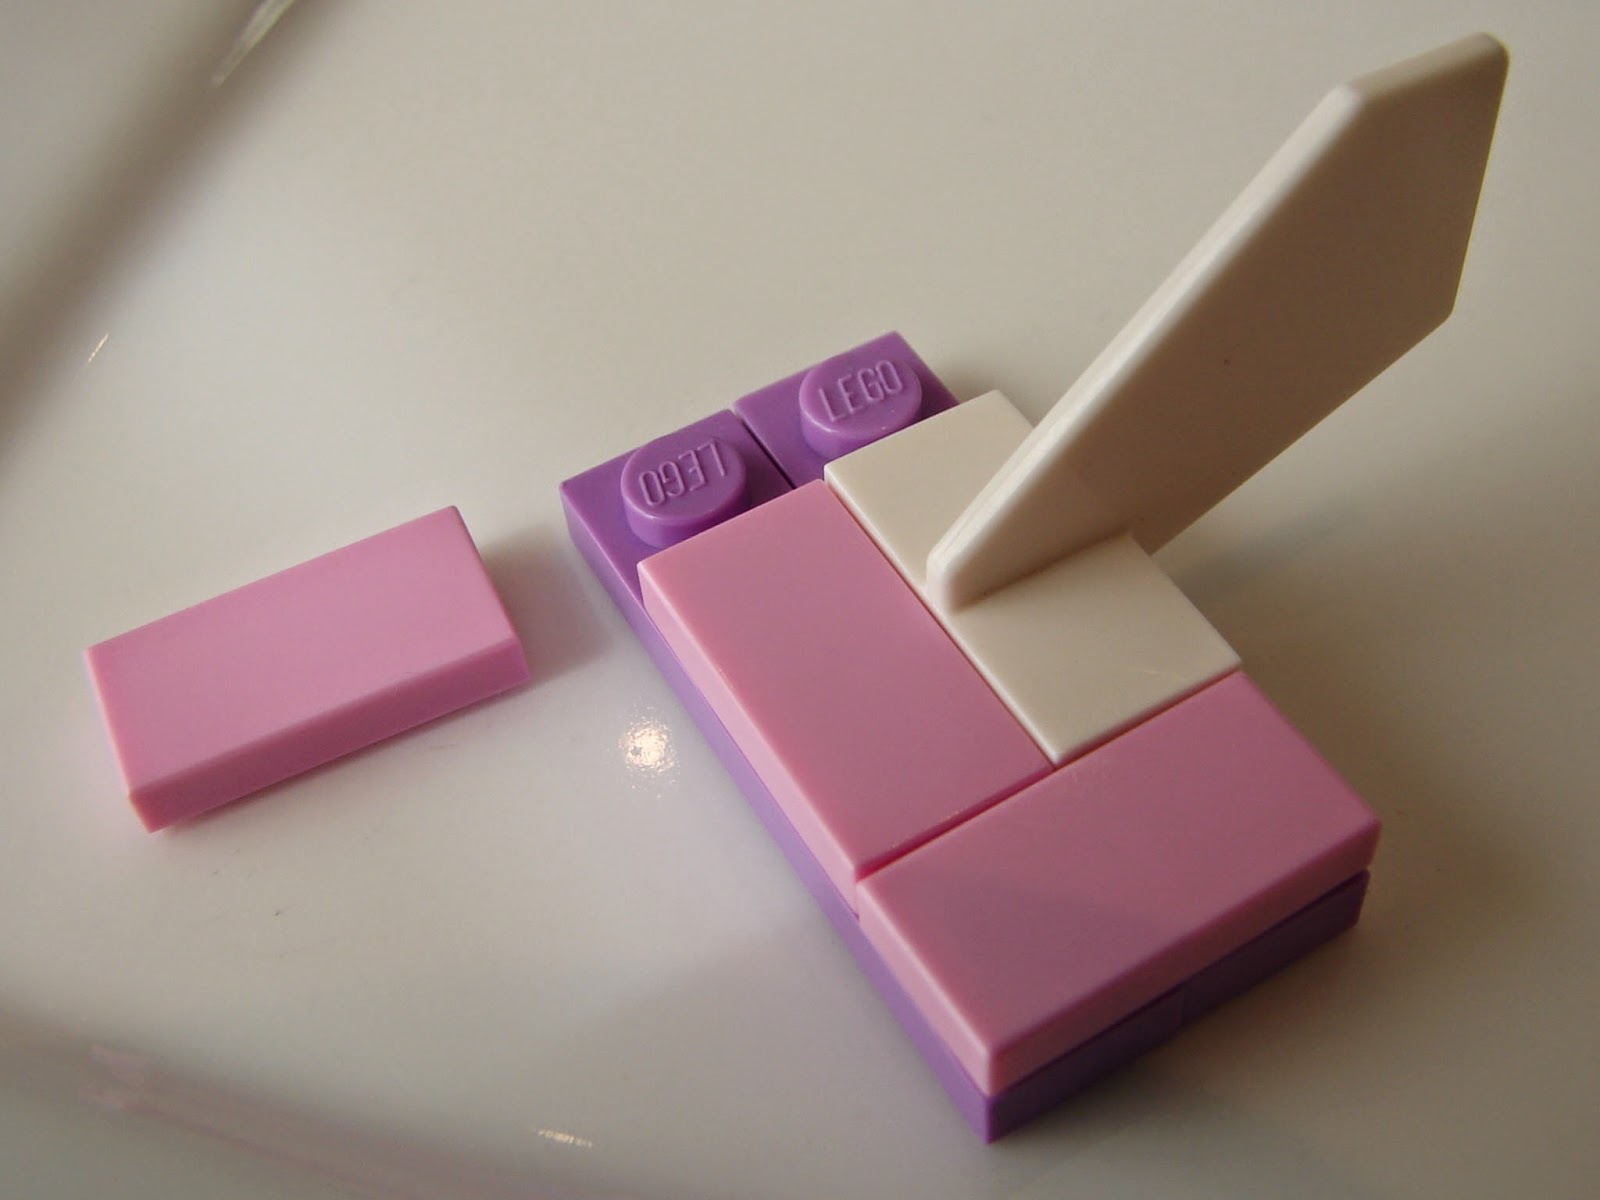
Step 1: Attach propeller to white 1x2 brick with stud.  Add 1 pink 1x2 tile to clear 2x2 slope.  Put tires on axle plate.  Place white tailfin on lavender 1x4 plate and 1 pink 1x2 tile on second lavender 1x4 plate.

Step 2: Add pink 2x2 bricks to one aqua 2x8 plate.

Step 3: Attach the propeller assembly to front of aqua 2x8 plate.  Place 1 pink 1x2 tile on top of white propeller brick.  Add steering wheel.

Step 4: Complete the tailfin assembly by joining the lavender 1x4 plates with 2 pink 1x2 tiles.

Step 5: Add tail assembly to pink 2x2 brick as shown.

Step 6: Add windsheild to second aqua 2x8 plate.

Step 7: Add pink 1x2 tiles and white 1x2 grills to aqua plate to complete wing assembly.

Step 8: Add wing assembly to pink 2x2 brick.

Step 9: Add wheel assembly to underside of aqua plate.

Notes: Now you’re ready to fly.

©2014 Brick Trick Dude.  ALL RIGHTS RESERVED.
Images and directions are the copyrighted property of Brick Trick Dude and may not be re-produced from this blog posting without express written permission from the Brick Trick blog operators.

Sunday, November 10, 2013

HOLIDAY ARBOR and LIGHTS - Custom Building Kit Instructions

Above: The Brick Trick Dude HOLIDAY ARBOR and LIGHTS custom building kit shown assembled with s female minifigure we named Noelle.

Below: The same kit with a male minifigure we named Nicholas. 

HOLIDAY ARBOR and LIGHTS - Custom Building Kit Instructions

This posting features images and instructions to build this custom created kit.

You can find Brick Trick Dude kits on Ebay, CLICK HERE.

NOTE: You can enlarge the images by clicking on them.

Below: Parts included in the HOLIDAY ARBOR and LIGHTS Custom Building Kit
PARTS LIST
3 green 3x4 leaf parts
1 green 4x8 plate
9 red trans. 1x1 caps
2 green trans. 1x1 caps
2 medium blue trans. 1x1 caps
2 yellow trans. 1x1 caps
2 red 2x2 flowers
2 lime 1x1 caps
4 green bamboo leaf parts
4 red 2x2 tiles
8 dark gray 1x1 bricks
9 white 1x1 plates with grabber
1 white rope w/9 bars, end caps
2 white 1x2 tiles
1 clear transparent 1x2 plate
1 light gray 1x2x6 arch brick
8 green trans. 1x1 plates

Step 1: Add red 2x2 tiles to green 4x8 plate.  Place red transparent 1x1 caps on green leaf parts as shown.  Place lime 1x1 caps on red 2x2 flowers, then create 2 stacks of 2 bamboo leaf parts.  Top leaf stacks with red flowers.  Add clear 1x2 plate and white 1x2 tiles to top of light gray 1x2x6 arch brick.  Alternately stack dark gray 1x1 bricks and green transparent 1x1 plates to build archway posts.

Step 2: Add posts and archway to green 4x8 plate.  

Step 3: Attach 2 green leaf parts with red transparent 1x1 caps to pegs on clear 1x2 plate as shown.  Add remaining green leaf to peg of right leaf, facing to front.  Place flowers on pegs of the green 4x8 plate on either side of red tile walkway.

Step 4:  Create the holiday string of lights by inserting red, yellow, green and medium blue transparent 1x1 caps into white 1x1 plates with grabber.  Attach grabbers to rods on white rope with end caps.  Light string can be placed in minifigure hands using end caps and/or rods.

Sunday, October 20, 2013

Flower Garden and Purple Bench Custom Kit Instructions

Above: The Flower Garden and Purple Bench Custom Kit shown assembled.

Flower Garden and Purple Bench Custom Kit - Building Instructions

Order this and lots of other custom kits and items in the BrickTrickDude online Ebay store,
CLICK HERE.

REMINDER: Enlarge the images by clicking on them.

Below: Parts included in the custom kit.
Parts List:
1 dark green 4x8 plate
1 medium lavender 2x6 plate
2 dark purple 1x2 bricks
1 tan 1x6 brick
2 red transparent 1x1 tiles
2 lime 1x2 tiles
1 white 1x4 picket fence
4 dark purple 1x1 bricks
1 red 2x2 flower
1 yellow 2x2 flower
1 orange 1x1 cap
1 lime 1x1 cap
3 green bamboo leaf parts
GAL PAL Minifigure “Melissa” arrives assembled.
1 bright light yellow wig
1 female head w/eyebrows, pink lipstick
1 stars printed torso
1 orange hips/legs

Step 1: Add tan 1x6 brick to dark green 4x8 plate as shown.  Add lime 1x2 tiles on dark green 4x8 plate at front.  Form bench by adding 2x6 plate to 1x2 bricks. Create 2 stacks of 2 dark purple 1x1 bricks and top with red transparent 1x1 tiles.  Place lime and orange 1x1 caps on red and yellow 2x2 flowers as shown.  Stack 2 bamboo leaf parts.  Add 2x2 flowers with caps to leaf parts. 

Step 2: Add purple posts and white picket fence to tan 1x6 brick.

Step 3: Add bench as shown.

Step 4: Add 2x2 flowers and leaf parts to layout as shown.

Above: Kit shown assembled.

Above: Kit shown from back side.

Wednesday, September 18, 2013

2013 Row House Series

Above: Classic mid-century row houses in San Francisco built from plastic bricks.

2013 SAN FRANCISCO ROW HOUSE SERIES

This series of 35 row houses was built by BrickTrick artist Philip Buchan.  The series mimics homes built from the late nineteen forties through the early nineteen fifties throughout several neighborhoods in San Francisco.  The structures in this collection were patterned after homes in the Miraloma Park neighborhood on the side of Mount Davidson.

Above: Many row houses features stairways to a second floor entry.

Above: Detail close-up.

Above: Some row houses are painted in bright and bold color schemes.

Above: Some row houses have first floor entries.

Above: Some row houses have a more sleek and "modern" appearance to the architecture.

Above: Many row houses feature archways over doorways and garages.

Above: Some row houses with first floor entries have a small covered porch.

Above: It's not uncommon to see a first floor entry next door to a second floor entry.

Above: Beige is banished in this bold color scheme.

Above: More variations of row house architecture.

Above: Some row houses employ more traditional architectural elements and appear more European or Mediterranean in style.