WELCOME TO THE BRICK TRICK ONLINE STUDIO

Here you can view our designs, projects and building instructions.
Showing posts with label female minifigure. Show all posts

Monday, September 8, 2014

Earrings Made From Minifigures

Above: Minifigure "Chef Girls" have been made into dangle earrings.

Earrings Made From Minifigures

We took several of our favorite minifigures and turned them into earrings.  We simply glued the minifigure wig or hat in place on the minifigure head, and then we drilled a small hole centered at the top.  Threaded metal eye-hooks were screwed into the holes and then proper ear wires were attached to complete the earrings.

Earrings make a great gift.  Find many designs in the Brick Trick Dude Ebay store, CLICK HERE.

Above: A cowgirl and cowboy set of earrings.

Above: The "Movie Star" earrings.

Tuesday, May 20, 2014

PINK & AQUA AIRPLANE CUSTOM KIT - BUILDING INSTRUCTIONS

Above: The PINK & AQUA Airplane kit shown assembled with female minifigure Amelia.

PINK & AQUA AIRPLANE CUSTOM KIT - BUILDING INSTRUCTIONS

This posting contains images and directions identical to the printed directions that are included when you purchase this custom building kit from BRICK TRICK DUDE on Ebay.


Above: Parts included in the custom building kit.

PARTS LIST
1 white 1x2 tile w/tailfin
1 black/white steering wheel
1 clear transparent 2x2
   45-degree slope
1 black propeller
1 white 1x2 brick w/stud
2 aqua 2x8 plates
2 medium lavender 1x4 plates
2 bright pink 2x2 bricks
2 white 1x2 grills
9 bright pink 1x2 smooth tiles
2 white rims
2 black rubber tires
1 light gray 2x2 axle plate

Minifigure Pilot “Amelia” is assembled and includes:
1 brown ponytail wig
1 female head with pink lipstick
1 rainbow stars pattern torso
1 orange hips/legs

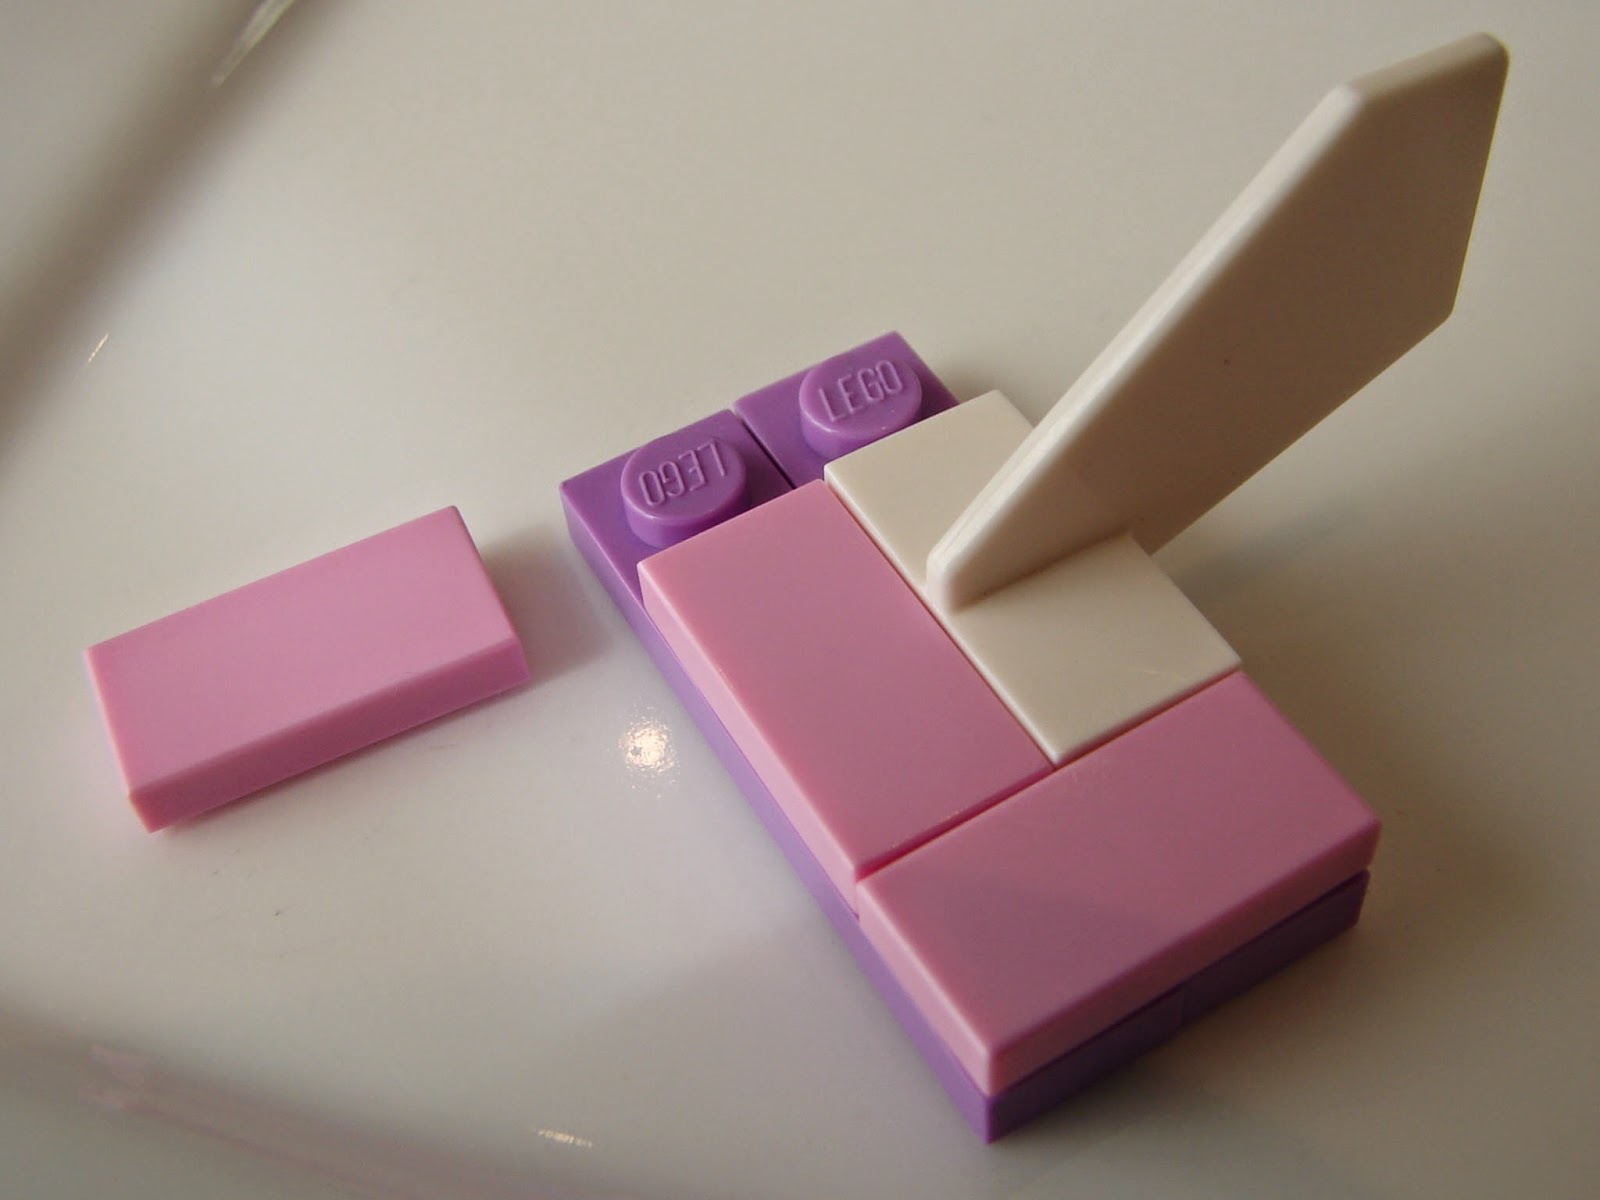
Step 1: Attach propeller to white 1x2 brick with stud.  Add 1 pink 1x2 tile to clear 2x2 slope.  Put tires on axle plate.  Place white tailfin on lavender 1x4 plate and 1 pink 1x2 tile on second lavender 1x4 plate.

Step 2: Add pink 2x2 bricks to one aqua 2x8 plate.

Step 3: Attach the propeller assembly to front of aqua 2x8 plate.  Place 1 pink 1x2 tile on top of white propeller brick.  Add steering wheel.

Step 4: Complete the tailfin assembly by joining the lavender 1x4 plates with 2 pink 1x2 tiles.

Step 5: Add tail assembly to pink 2x2 brick as shown.

Step 6: Add windsheild to second aqua 2x8 plate.

Step 7: Add pink 1x2 tiles and white 1x2 grills to aqua plate to complete wing assembly.

Step 8: Add wing assembly to pink 2x2 brick.

Step 9: Add wheel assembly to underside of aqua plate.

Notes: Now you’re ready to fly.

©2014 Brick Trick Dude.  ALL RIGHTS RESERVED.
Images and directions are the copyrighted property of Brick Trick Dude and may not be re-produced from this blog posting without express written permission from the Brick Trick blog operators.

Sunday, November 10, 2013

HOLIDAY ARBOR and LIGHTS - Custom Building Kit Instructions

Above: The Brick Trick Dude HOLIDAY ARBOR and LIGHTS custom building kit shown assembled with s female minifigure we named Noelle.

Below: The same kit with a male minifigure we named Nicholas. 

HOLIDAY ARBOR and LIGHTS - Custom Building Kit Instructions

This posting features images and instructions to build this custom created kit.

You can find Brick Trick Dude kits on Ebay, CLICK HERE.

NOTE: You can enlarge the images by clicking on them.

Below: Parts included in the HOLIDAY ARBOR and LIGHTS Custom Building Kit
PARTS LIST
3 green 3x4 leaf parts
1 green 4x8 plate
9 red trans. 1x1 caps
2 green trans. 1x1 caps
2 medium blue trans. 1x1 caps
2 yellow trans. 1x1 caps
2 red 2x2 flowers
2 lime 1x1 caps
4 green bamboo leaf parts
4 red 2x2 tiles
8 dark gray 1x1 bricks
9 white 1x1 plates with grabber
1 white rope w/9 bars, end caps
2 white 1x2 tiles
1 clear transparent 1x2 plate
1 light gray 1x2x6 arch brick
8 green trans. 1x1 plates

Step 1: Add red 2x2 tiles to green 4x8 plate.  Place red transparent 1x1 caps on green leaf parts as shown.  Place lime 1x1 caps on red 2x2 flowers, then create 2 stacks of 2 bamboo leaf parts.  Top leaf stacks with red flowers.  Add clear 1x2 plate and white 1x2 tiles to top of light gray 1x2x6 arch brick.  Alternately stack dark gray 1x1 bricks and green transparent 1x1 plates to build archway posts.

Step 2: Add posts and archway to green 4x8 plate.  

Step 3: Attach 2 green leaf parts with red transparent 1x1 caps to pegs on clear 1x2 plate as shown.  Add remaining green leaf to peg of right leaf, facing to front.  Place flowers on pegs of the green 4x8 plate on either side of red tile walkway.

Step 4:  Create the holiday string of lights by inserting red, yellow, green and medium blue transparent 1x1 caps into white 1x1 plates with grabber.  Attach grabbers to rods on white rope with end caps.  Light string can be placed in minifigure hands using end caps and/or rods.

Tuesday, August 7, 2012

Lime Greenhouse Custom Building Kit Instructions

Above: LIME GREENHOUSE shown assembled with female minifigure.

LIME GREENHOUSE Custom Building Kit Instructions.

This posting provides images and directions to assemble the LIME GREENHOUSE custom building kit sold by BrickTrickDude exclusively on Ebay.

REMINDER: Enlarge the images by clicking on them.

Below: Parts included in the kit.
PARTS LIST
1 dark tan 6x8 plate
16 lime 1x1 bricks
12 lime 1x2 45-degree slopes
12 clear trans. 2x2 45-degree slopes
42 clear trans. 1x2 bricks
7 lime 1x2 smooth tiles
4 green stalks w/3 stems each
3 sprues of 4 red flowers
2 green trans. 1x1 cones
1 yellow 2x2 flower
1 orange 1x1 cap

Step 1: Begin by assembling all the components used to create the greenhouse.  Build 4 stacks of 3 clear transparent 2x2 slopes for the roof.  Create 4 stacks of 4 lime 1x1 bricks to serve as the columns at each corner of the greenhouse.  Remove red flowers from center sprues and place on green stems, stack stalks in 2 groups of two for bouquets.  Stack both green transparent 1x1 cones, add yellow 2x2 flower and top with the orange 1x1 cap to create the sunflower.  Build 9 stacks of 4 clear transparent 1x2 bricks.  Assemble the 2 “gable roof ends” by stacking 3 clear transparent 1x2 bricks as shown, and then add the lime 45-degree slopes.  Now you have all the components assembled to begin constructing the greenhouse.

Step 2: Begin by adding 3 stacks of clear 1x2 bricks and 2 stacks of lime 1x1 bricks to the dark tan 6x8 plate as shown to form the back wall of the greenhouse.  Then place one lime 1x2 tile on the dark tan plate as shown.

Step 3: Add the sunflower situated between four pegs at back of green plate as shown.

Step 4: Add the red flower bouquets to pegs on the green 6x8 plate as shown.

Step 5: Add 2 stacks of 1x2 clear bricks to each side of the dark tan 6x8 plate.

Step 6: Add remaining lime 1x1 columns and stacks of clear bricks to build front wall.

Step 7: Add one of the gable roof ends to the back wall of the greenhouse. 

Step 8: Carefully add the 4 stacks of clear slopes to build the greenhouse roof.

Step 9: Add the remaining gable roof end to the front wall of the greenhouse.

Step 10: Carefully add the lime 1x2 tiles to the roof; this will require a light touch.

Notes: Gripping the sides of the greenhouse when adding tiles on roof line eases application.

Above: LIME GREENHOUSE shown assembled with male minifigure.

Sunday, May 13, 2012

PURPLE JUICE BAR KIT • BUILDING INSTRUCTIONS

Above: The PURPLE JUICE BAR custom building kit shown assembled with female minifigure "TAMMY".

PURPLE JUICE BAR CUSTOM KIT • BUILDING INSTRUCTIONS

This posting contains images and instructions identical to the printed directions which come with this custom building kit available from BRICK TRICK DUDE on Ebay®.

REMINDER: Enlarge the images by clicking on them.

Check out the BRICK TRICK DUDE store on Ebay®, go here: http://stores.ebay.com/bricktrickdude


Above: The PURPLE JUICE BAR shown with male minifigure "TIMMY".

Above: Part included in the PURPLE JUICE BAR custom kit.

PARTS LIST
1 orange trans. 1x1x2/3 slope
1 blue 1x2 45-degree slope
1 dark purple 1x2 brick w/hole
1 black/gray gearshift
7 lime 1x1 caps
1 black antennae pole
1 dark purple 4x4 parabola
4 aqua trans 2x2 round bricks
1 lime 1x2 plate
4 lime 1x4 plates
9 orange 1x1 caps
6 dark purple 2x3 plates
9 purple trans. 1x1 cones

Step 1: Place orange transparent slope on top of blue 1x2 slope to create cash register.  Put 1 lime 1x1 cap on to the dark purple parabola.  Place orange 1x1 caps on purple transparent 1x1 cones to build juice bottles.

Step 2: Lay out 3 dark purple plates and snap on the dark purple 1x2 brick as shown.

Step 3: Snap on 4 aqua blue transparent 2x2 round bricks.

Step 4: Add remaining 3 dark purple plates.

Step 5: Place 4 lime 1x4 plates as shown.

Step 6: Add lime 1x2 plate.

Step 7: Place 6 lime 1x1 caps on bottom of bar as shown.

Step 8: Place the black and gray gearshift on top of one juice bottle to create sampler pump.  Add pump, cash register and black pole to bar top.

Step 9: Snap dark purple parabola on to black pole to complete the umbrella.  Stack juice bottles on bar as shown or any way you like.

Tuesday, January 17, 2012

2012 FLOWER GARDEN and BENCH KIT • BUILDING INSTRUCTIONS


Above: The new 2012 FLOWER GARDEN and BENCH kit shown assembled with gal pal Sophia.

2012 FLOWER GARDEN and BENCH KIT • BUILDING INSTRUCTIONS

This posting contains images and written directions identical to the printed instructions which come with this custom building kit available exclusively from BrickTrickDude on Ebay®.

REMINDER: Enlarge the images by clicking on them.

Below: Parts included in this custom kit.


PARTS LIST
1 dark green 6x10 plate
7 green bamboo leaf parts
1 reddish-brown 2x6 plate
2 reddish-brown 1x2 palisade bricks
4 tan 1x1 bricks
2 red transparent 1x1 tiles
1 tan 1x6 brick
1 dark purple 1x1 cap
1 orange 1x1 cap
2 lime 1x1 caps
3 dark tan 2x2 tiles
1 black 1x4 lattice fence
1 white 2x2 flower
2 yellow 2x2 flowers
1 blue 2x2 flower
2 sprues of 4 dark pink flowers
2 sprues of 4 red flowers
4 green stalks with 3 stems

GAL PAL Minifigure “Sophia” is assembled.
1 dark brown “ponytail with side bangs” wig
1 female head w/eyebrows, red lipstick/alternate face
1 white/blue printed torso
1 blue hips/legs


Step 1: Add tan 1x6 brick to dark green 6x10 plate as shown. Form bench by adding 2x6 plate to 1x2 palisade bricks. Create 2 stacks of 2 tan 1x1 bricks and top with red transparent 1x1 tiles. Place 1x1 caps on 2x2 flowers as shown. Build a stack of 2 and 3 bamboo leaf parts. Add 2x2 flowers with caps to leaf parts. Remove small flowers from sprues and place on green stalks with 3 stems. Stack 2 stems together to form 2 bouquets of small flowers.


Step 2: Add tan posts and black lattice fence to tan 1x6 brick. Place dark tan 2x2 tiles on dark green 6x10 plate at front. Add bench as shown.


Step 3: Add bouquets to front corners of 6x10 plate. Add 2x2 flowers/leaf parts to layout as shown or any way that suits your gardening taste.