WELCOME TO THE BRICK TRICK ONLINE STUDIO

Here you can view our designs, projects and building instructions.

Tuesday, April 28, 2009

ORANGE CONVERTIBLE CAR KIT • BUILDING INSTRUCTIONS


Above: The ORANGE CONVERTIBLE CAR KIT shown assembled with female minifigure driver "Dani".

ORANGE CONVERTIBLE CAR KIT • BUILDING INSTRUCTIONS

This posting features images and building directions for the BRICK TRICK DUDE original custom building kit sold as the ORANGE CONVERTIBLE CAR kit on Ebay.

Below: The ORANGE CONVERTIBLE CAR shown from the rear view.


Below: Parts included in the BRICK TRICK DUDE custom building kit for this project.

PARTS LIST
1 red 2x8 plate
1 white 1x2 smooth tile
2 red trans. 1x1x2/3 slopes
2 red trans. 1x1 cones
2 yellow trans. 1x1 caps
2 orange 1x2 45-degree slopes
1 dark gray 1x2 grill
1 black/white steering wheel
2 red 2x2 smooth tiles
2 orange 1x1 caps
4 orange 1x2 grills
2 red 1x4x2 angle plates
2 orange 1x1 bricks
1 black 2x2 plate
1 orange 2x2 brick
1 clear 1x4x2 windshield
2 light gray 2x2 axle plates
4 black tires on 4 gray rims
4 clear trans. 1x2 plates
3 black 2x4 plates
4 orange 1x4 arch bricks

REMINDER: Enlarge the images simply by clicking on them.


Step 1: Place red transparent 1x1 cones as taillights on one of the red 1x4x2 angle plates and add white 1x2 smooth tile to indicate the license plate; this creates the rear bumper. Place yellow transparent 1x2 caps as headlights on remaining red 1x4x2 angle plate and add dark gray grill to indicate radiator; this builds the front bumper. Add red transparent 1x1x2/3 slopes to orange 1x2 45-degree slopes; this creates the rear taillight “fins”. Snap orange 1x1 caps to pegs on top of the clear 1x4x2 windshield. Assemble clear transparent 1x2 plates into two stacks of two plates each.


Step 2: Begin chassis assembly by placing black 2x4 plates and light gray 2x2 axle plates on the red 2x8 plate as shown.


Notes: Image above shows the car chassis from the underside, as it will look following assembly directions in Step 2.


Step 3: Add orange 2x2 brick, steering wheel, black 2x2 plate and the 2 orange 1x1 bricks to topside of chassis as shown.


Step 4: Add stacks of 2 clear 1x2 plates to headlight and taillight bumper assemblies. Place bumpers on chassis at front and back as shown.


Step 5: Attach orange 1x4 arch bricks to form fenders.


Step 6: Add windshield. Place the orange and red transparent slope “fins” on car as shown.


Step 7: Add red 2x2 smooth tiles and orange 1x2 grills to finish the car “body”.


Step 8: Carefully add the wheel assemblies to the four stud pegs on both 2x2 light gray axle plates and you’re ready to roll!


Notes: Change the look of your car by simply replacing the orange arch bricks and other parts with your own colors.


Above: Finished convertible car model along with minifigure driver, GAL PAL Dani.

Saturday, April 25, 2009

NEW BRICK TRICK BUILDING KIT DESIGNS • April 2009


Above: A bold orange convertible car kit shown assembled with a female minifigure driver.

NEW BRICK TRICK BUILDING KIT DESIGNS • April 2009

Greetings BRICK TRICK BLOG Friends!

We've been busy this month working on new designs to add to our popular line of custom building kits. This posting features three of our many new ideas. You can use your own bricks and parts to build these kits or purchase the complete set of bricks with directions from BRICK TRICK DUDE on Ebay. We hope you enjoy our new designs!

NOTE: Find custom building kit directions, CLICK HERE.

View and purchase custom building kits from BRICK TRICK DUDE on Ebay, CLICK HERE.

Below: The PURPLE & LIME QUAD BIKE with a gal pal wearing a bright orange jumpsuit and sporting a mod "page" style hairdo.


Above: The popular, (and often sold out), PINK ICE CREAM CART, (this is design number three), has been slightly restyled and has a new female minifigure serving up ice cream sundaes. Meet "Chloe, The Ice Cream Girl", she has a cool hairdo, wears a gray sweatshirt with bright red pants and she even has on red lipstick!

PINK ICE CREAM CART Design #3 • BUILDING INSTRUCTIONS


Above: Another version of the popular BRICK TRICK DUDE building kit, the PINK ICE CREAM CART Design Number Three features female minifigure "Chloe, The Ice Cream Girl".

PINK ICE CREAM CART Design #3 • BUILDING INSTRUCTIONS

This area will be available shortly.

PURPLE & LIME QUAD BIKE • BUILDING INSTRUCTIONS


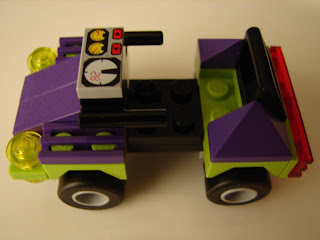
Above: The PURPLE and LIME QUAD BIKE shown assembled with a female minifigure.

PURPLE & LIME QUAD BIKE • BUILDING INSTRUCTIONS

This posting features images and direction to build the PURPLE & LIME QUAD BIKE designed by BRICK TRICK DUDE and sold exclusively on Ebay.

Below: Parts included in the BRICK TRICK DUDE custom building kit.

PARTS LIST
2 dark purple 1x2 grills
2 black 2x2 plates
2 dark purple 1x3 33-degree slopes
2 dark purple 1x2 3-sided slopes
1 gray printed 1x2 tile
1 black 1x2 plate w/handles
2 light gray 2x2 axle plates
1 black 2x4 plate
1 clear transparent 1x2 plate
2 lime 2x4 mudguard plates
4 yellow transparent caps
2 red transparent 1x2 grills
1 lime 1x4x2 angle plate
1 lime 1x4 plate
4 black tires on 4 gray rims
1 black 1x2 tile w/handle


Step 1: Place rims/tires on axle plates. Put gray printed 1x2 tile on black 1x2 plate with handles. Snap lime 2x4 mudguards on black 2x4 plate at each end on two pegs; add grills & slopes.


Step 2: Add black 2x2 plate and clear 1x2 plate to underside of chassis as shown. Place yellow transparent caps on lime 1x4 plate as shown.


Step 3: Add lime 1x4 to create front “bumper”. Place 2x2 black plate between lime mudguards. Add red transparent 1x2 grills to 1x4x2 lime angle plate to create taillights.


Step 4: Place both 1x3 33-degree slopes on front lime mudguard plate and over 2 remaining pegs of lime 1x4 plate. Add black 1x2 plate with handles and tile as shown.


Step 5: Add lime taillight assembly to rear mudguard and top with black tile/handle as shown in Step 4. Snap wheel assemblies to underside of chassis and add minifigure.


Above: PURPLE & LIME QUAD BIKE shown from another vantage point.

Thursday, April 16, 2009

TAN TRI-LEVEL TOWNHOUSE


Above: The TAN TRI-LEVEL TOWNHOUSE built by brick trick artist PHILIP BUCHAN.

TAN TRI-LEVEL TOWNHOUSE

Philip's series of big city buildings continues with the TAN TRI-LEVEL TOWNHOUSE modeled after a three-story building here in SAN FRANCISCO. Philip first built the model working from a photograph using the DIGITAL DESIGNER software available from the brick manufacturer. Then he constructed the building using a combination of tan, white, black, cream, (aka light yellow), and dark orange bricks and parts.

Below: A close-up of the ground level shows two large arches providing access the the garage door, the basement door and the stairs to the upper floors.


Above: This shot shows the roof line detail and the arched windows on the second and third floors. Clear transparent 1x2 plates were used to create the window "glass".

Below: Another view of the TAN TRI-LEVEL TOWNHOUSE.


Above: On the roof at the back of the building is a deck accessible through the arch window.

Saturday, April 11, 2009

MAGENTA PINK CANDY CART • BUILDING INSTRUCTIONS


Above: Finished model with female minifigure.

MAGENTA PINK CANDY CART KIT • BUILDING INSTRUCTIONS

NOTE: Images can be enlarged simply by clicking on them.

Below: Parts contained in the MAGENTA PINK CANDY CART KIT.

PARTS LIST
1 dark pink flag
2 clear transparent 1x2x2 windows
4 magenta 1x2 bricks
1 black antennae pole
2 white 1x2 inverse slopes
1 black handle part
2 white 1x2 smooth tiles
2 black 2x2 axle plates
4 black tires on 4 white rims
1 white 2x6 plate
1 white 2x4 plate
2 gray/black gearshifts
1 dark pink cylinder brick
3 aqua blue transparent 1x1 caps
2 red 1x1 caps
2 orange 1x1 caps
2 bright pink 1x1 caps


Step 1: Place wheels on axle plates. Stack magenta 1x2 bricks as shown. Stack aqua transparent caps and top with gearshift. Add gearshift to dark pink cylinder.


Step 2: Place white inverse slopes on white 2x6 plate, top with black handle and 1 white 1x2 smooth tile. Add second tile to 2x6. Add 1 stack of magenta bricks and windows.


Step 3: Place red, orange and bright pink caps inside of windows and finish end with remaining stack of magenta 1x2 bricks. Top with white 2x4 plate. Place flag on pole.


Step 4: Add flag to top of cart as shown, setting base between 4 of the pegs. Place dark pink cylinder w/gearshift and stack of aqua caps w/gearshift on black handle part.


Step 5: Add wheel assemblies to bottom of white 2x6 plate at each end as shown.